How do I replace my worn out Razor kick scooter wheels? This DIY guide answers this most important questions and gets you on a smooth ride in no time!
So here is the scenario: A while back you bought that popular Razor Kick Scooter for adults (could be a kid's one but we assume that you are a grown up) that's pretty cool and you rode it 'til the wheels got scuffed, scraped and bruised. Or maybe you got one of the best kids scooters for your child, which was perfect since it came with an adjustable stem designed for long term use.
Durable as it is, after a long time of trekking on gravel and up and down bumpy tarmac roads, one or both wheels cracked or showed holes and other deformities. You or your child start to complain about a rough, bumpy ride on the scooter. There is nothing worse than the sound of a child fussing about a scooter they love that doesn't seem to ride properly anymore!
Now that you've come to love this favorite scooter, determined the problem i.e. the wheels or bearings are worn out. You've purchased replacement wheels and bearings but now what? How are you supposed to get it back to its smooth-scooting self again? Fear no more! Here is your ultimate guide on the steps necessary to replace those worn out scooter wheels and bearings.
If this guide is a few steps ahead of where you are right now, and you just need to buy the replacement wheels but the options seem too many; see out gide on "How To Choose Replacement Scooter Wheels".
Tools Needed
Set of replacement Razor Scooter Wheels
3/16" Allen Wrench (usually that's provided with replacement wheels)
How to Remove the Razor Scooter Wheel
We cover two methods here. Changing the wheels and bearings if you only have one wrench and the 2nd method if you have 2 wrenches.
If you have only one Allen wrench
- First, remove your replacement wheels from their packaging and put the enclosed hex key or Allen wrench aside
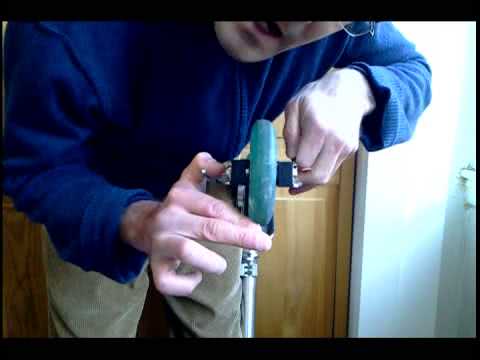
- Place your hands on both sides of the front wheel of your scooter and grip tight so the wheels don't move
- Insert the Allen wrench in the front left axle bolt (this should be the longer bolt of the two)
- To loosen the axle bolt, turn the wrench and then pull out the bolt
- If the bolt will not move, get another Hex or Allen wrench and place it in the opposing bolt to use as leverage
- Now, insert the Allen wrench into the smaller, front right axle bolt
- Do the same, turn it then pull out the bolt
- Finally, you can give that old front wheel a well-deserved break by removing it from your scooter
If you have two Allen wrenches
Here's how to change the scooter wheels and bearings in 3 quick steps:

- Flip your scooter upside down. The handlebars and brake would be touching the ground in this setup
- Grab both Allen wrenches. Insert one wrench for each screw situated on either side of the wheel. Hold the other screw in place as you proceed in turning the other screw to loosen it. Turn in a counter-clockwise direction. Once you've successfully turned and let go of both screws, the old wheel can now be detached from the scooter
- Now, it's time to replace the wheels, find the metal sleeve located in the center of the bearing and check if it's misaligned. Once the bearing is straightened out and free from any obstructions. Securely attach the replacement wheel into place onto your scooter's frame
Replacing the Wheel Bearings and Spacer
The bearings and spacer are essential components of the wheel assembly.

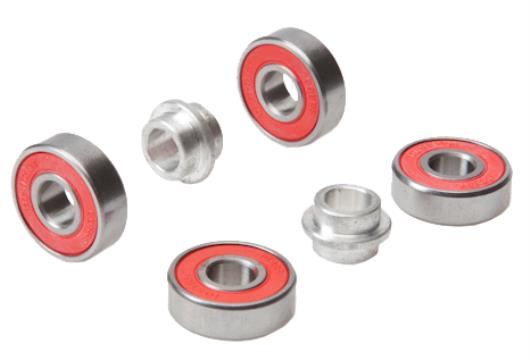
- Note - each wheel has 2 bearings. 1 on each side with a spacer between them
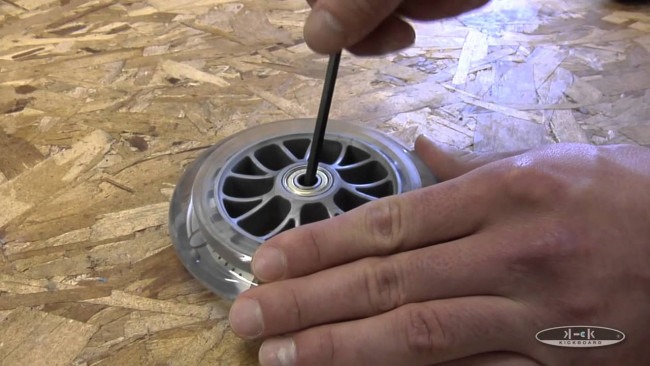
- Hold the wheel in your hand, then have the Allen wrench positioned at a diagonal angle into the middle of the wheel
- Push the wrench further inside to pop out the metal bearing
- Next, yank out the small metal, circular shaped spacer located in the middle of the wheel
- Turn the wheel over and then follow the same steps to remove the bearing from the other side of the wheel
- Get your replacement wheel
- Steadily and firmly press on both sides of the bearing
- Push the bearing securely in place into the center of the new wheel
- If the bearing does not quickly seat itself into your new wheel, you can give it a light nudge by tapping the bearing with a hammer
- You may also use a screwdriver to do help the bearing fit right so and repeat the process until you have a perfect fit
- Turn over your new wheel and the next thing to do would be to insert the spacer
- After this, the 2nd bearing must be pushed to fit on top of the spacer

Positioning the New Wheel
- Place the new wheel in the center of the metal forks at the front of the scooter
- Ensure the alignment of the spacer with the use of the Allen wrench
- Now you need to slide the longer axle bolt into the fork on the wheel
- Turn the Allen wrench until the bolt is fully tightened and secure
- Slide in the second axle bolt and do the same as the previous step
- Tighten the bolt securely in place with your Allen Hex wrench
- Follow the same steps for the back wheel
Here is a short list of things to look out for while replacing your old scooter wheels
- Regrading the wheel's axle bolts - one of the screws fit within the other screw, and must be carefully replaced so that the inner screw thread is tightly fit onto the outer thread of the opposing bolt.
- Be careful not to force on of the axle bolt screws into a misaligned opposing bolt sleeve, or misaligned bearing to prevent damaging the thread, bearing or wheel when the scooter is back in use
- Do not over tighten the screw but tighten just enough so that the wheel doesn't wobble
Once you're done with your DIY replacement for worn out scooter wheels, your Razor Kick Scooter should glide smooth as ever and give you a great time whenever you set out on the road again!
Changing Scooter Wheels and Bearings Video Guide
